CIWS, ECM, and Countermeasures: The Complete Guide
A complete overview of all missile defense methods available in naval battles in War Thunder Mobile.
This guide covers all anti-missile defense systems available in the fleet: from semi-automatic CIWS to the tactical use of ECM and decoys.
Learn how to protect yourself and your allies, combine defensive measures effectively, and hold your ground under a barrage of enemy missiles.
CIWS (Close-In Weapon System)
Type: Manual activation, automatic operation. Capacity: Unlimited. Reload Time: Rank V – 40 to 50 seconds; Ranks VI-VII – 20 to 35 seconds, depending on the specific CIWS mount. Duration: Rank V – 10 seconds; Ranks VI-VII – 4 to 6 seconds. Effectiveness: Rank V – low; Ranks VI-VII – medium. Depends on coverage zone, number of missiles in the salvo, and activation timing. Activation: 3–6 seconds before impact.
Your first line of defense is the CIWS. The system operates in a semi-automatic mode: it must be activatd manually by pressing the corresponding button, after which it will automatically search for incoming missiles within its operating range and attempt to intercept them. Mastering the correct activation timing is crucial.
The optimal time to activate CIWS is 3–6 seconds before missile impact. Pay close attention to trajectory: the chance of interception increases significantly once the missile has entered its terminal phase and is flying directly toward you without maneuvering.
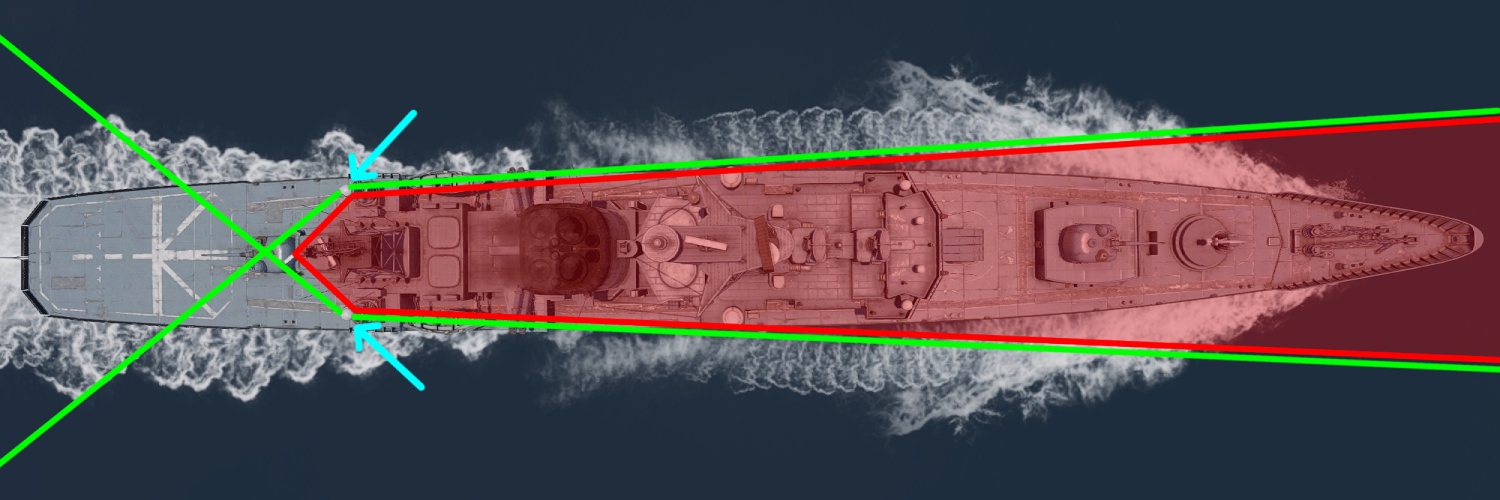
CIWS Dead Zones
Dead zones are areas not covered by CIWS mounts, leaving the ship most vulnerable during a missile attack. Their location depends entirely on the placement and type of CIWS on your ship.
The following examples illustrate how dead zones vary across several in-game ships.
JDS Hatakaze: Mounts are located in the stern, one on each side. Coverage is large, but a dead zone remains in the bow section.
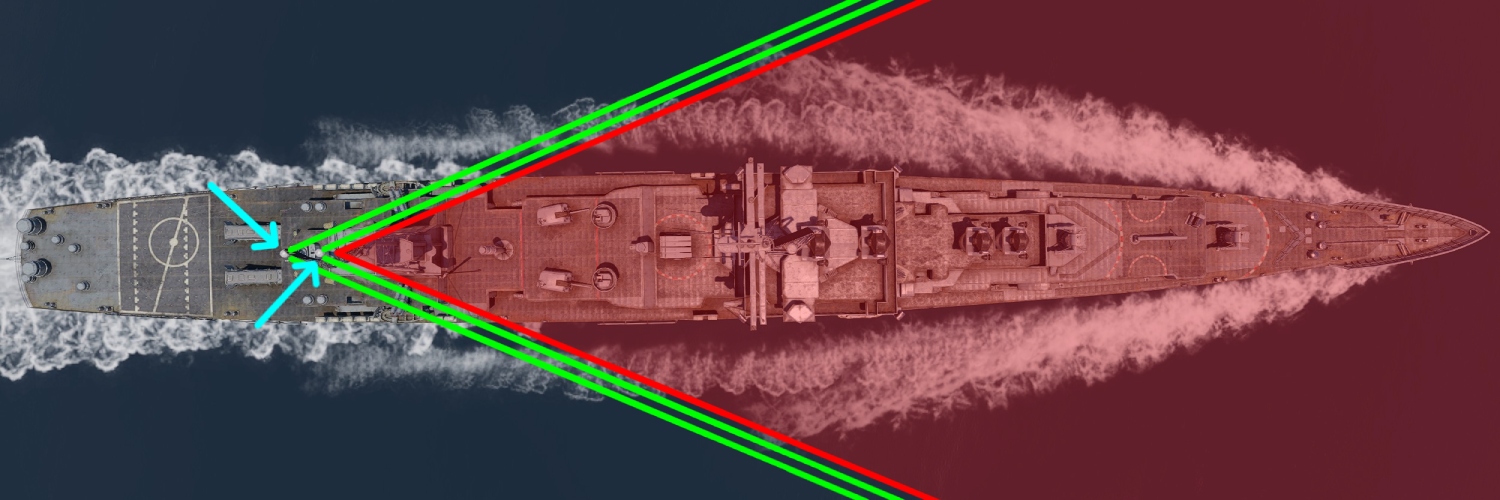
USS Long Beach: Mounts are positioned in the stern only, leaving a considerable dead zone.
Pr. 11661K: Mounts are positioned on both the bow and stern. Despite their small number, this ship's CIWS provides very broad coverage with almost no dead zones.
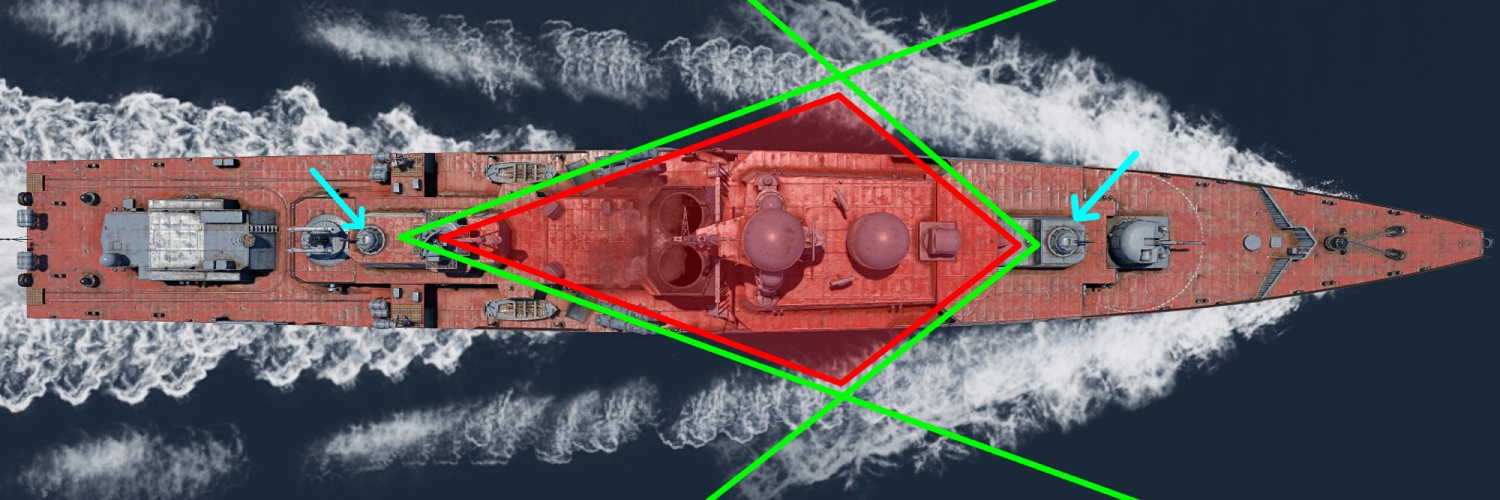
*Please note that the diagrams may have a margin of error of a few degrees.
Important! Activating CIWS does not guarantee complete protection. The system can make targeting errors, and the larger the incoming salvo, the greater the chance of error – a sufficiently large salvo can overwhelm the system entirely. However, your CIWS can also assist allies: if enemy missiles pass within range, it will attempt to intercept them even if they are not targeting your ship.
Differences Between CIWS Mounts
As detailed in the patch notes, the game features several CIWS systems, each differing in operation time, caliber, reload speed, rate of fire, and reaction speed.
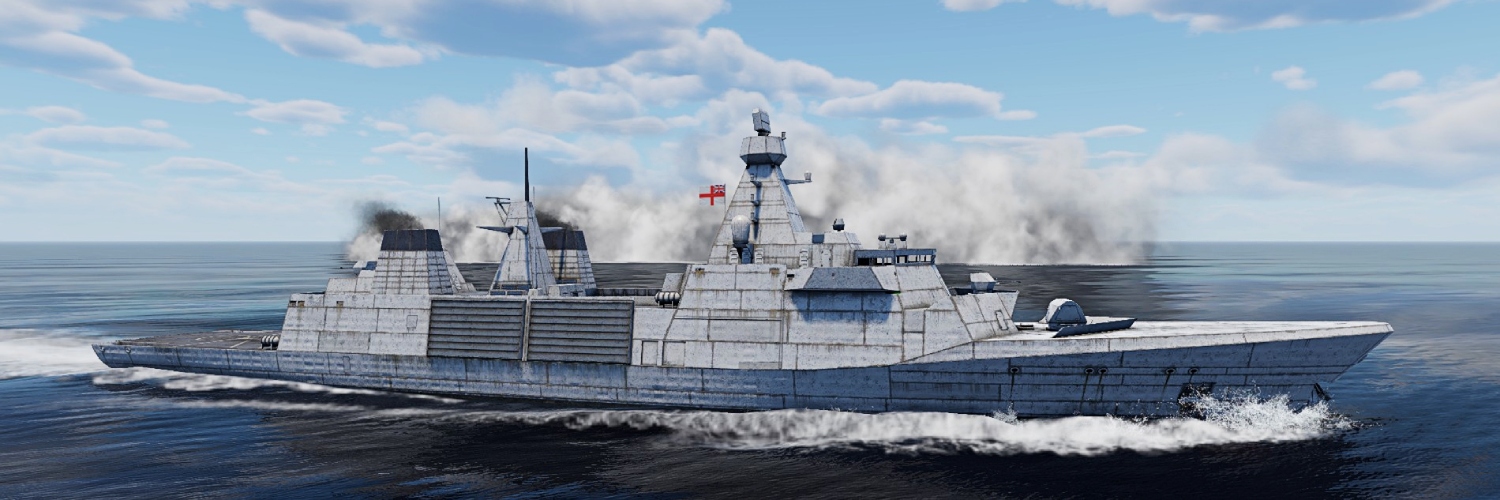
- USS Long Beach, USS Truxtun, USS Belknap, USS Bainbridge, USS South Carolina, USS Bunker Hill, USS Virginia, HMS Type 45, JDS Hatsuyuki, JDS Takatsuki, JDS Hatakaze, JDS Asagiri, and JDS Chokai – equipped with an American CIWS system offering short operation time and small caliber, offset by fast reload and high fire density.
- Pr. 1155, Pr. 956, Grozny, Pr. 1144, Pr. 1134B, and Pr. 11661K – equipped with a Soviet CIWS system featuring long operation time and large caliber, offset by a long reload.
- Pr. 11540 – equipped with a Soviet CIWS system offering very high fire density, offset by a long reload.
- HMS Type 22 and HNLMS Karel Doorman – equipped with a Dutch CIWS system featuring large caliber, with a balance of operation time and reload speed.
- Braunschweig, Sachsen, and Baden-Wurttemberg – equipped with a German CIWS system featuring large caliber and long operation time, offset by low fire density.
- HMS Type 31 – equipped with a Swedish CIWS system featuring large caliber and long operation time, offset by very low fire density.
Review your ship's stat card and X-ray mode to stay informed about the effectiveness of its CIWS.
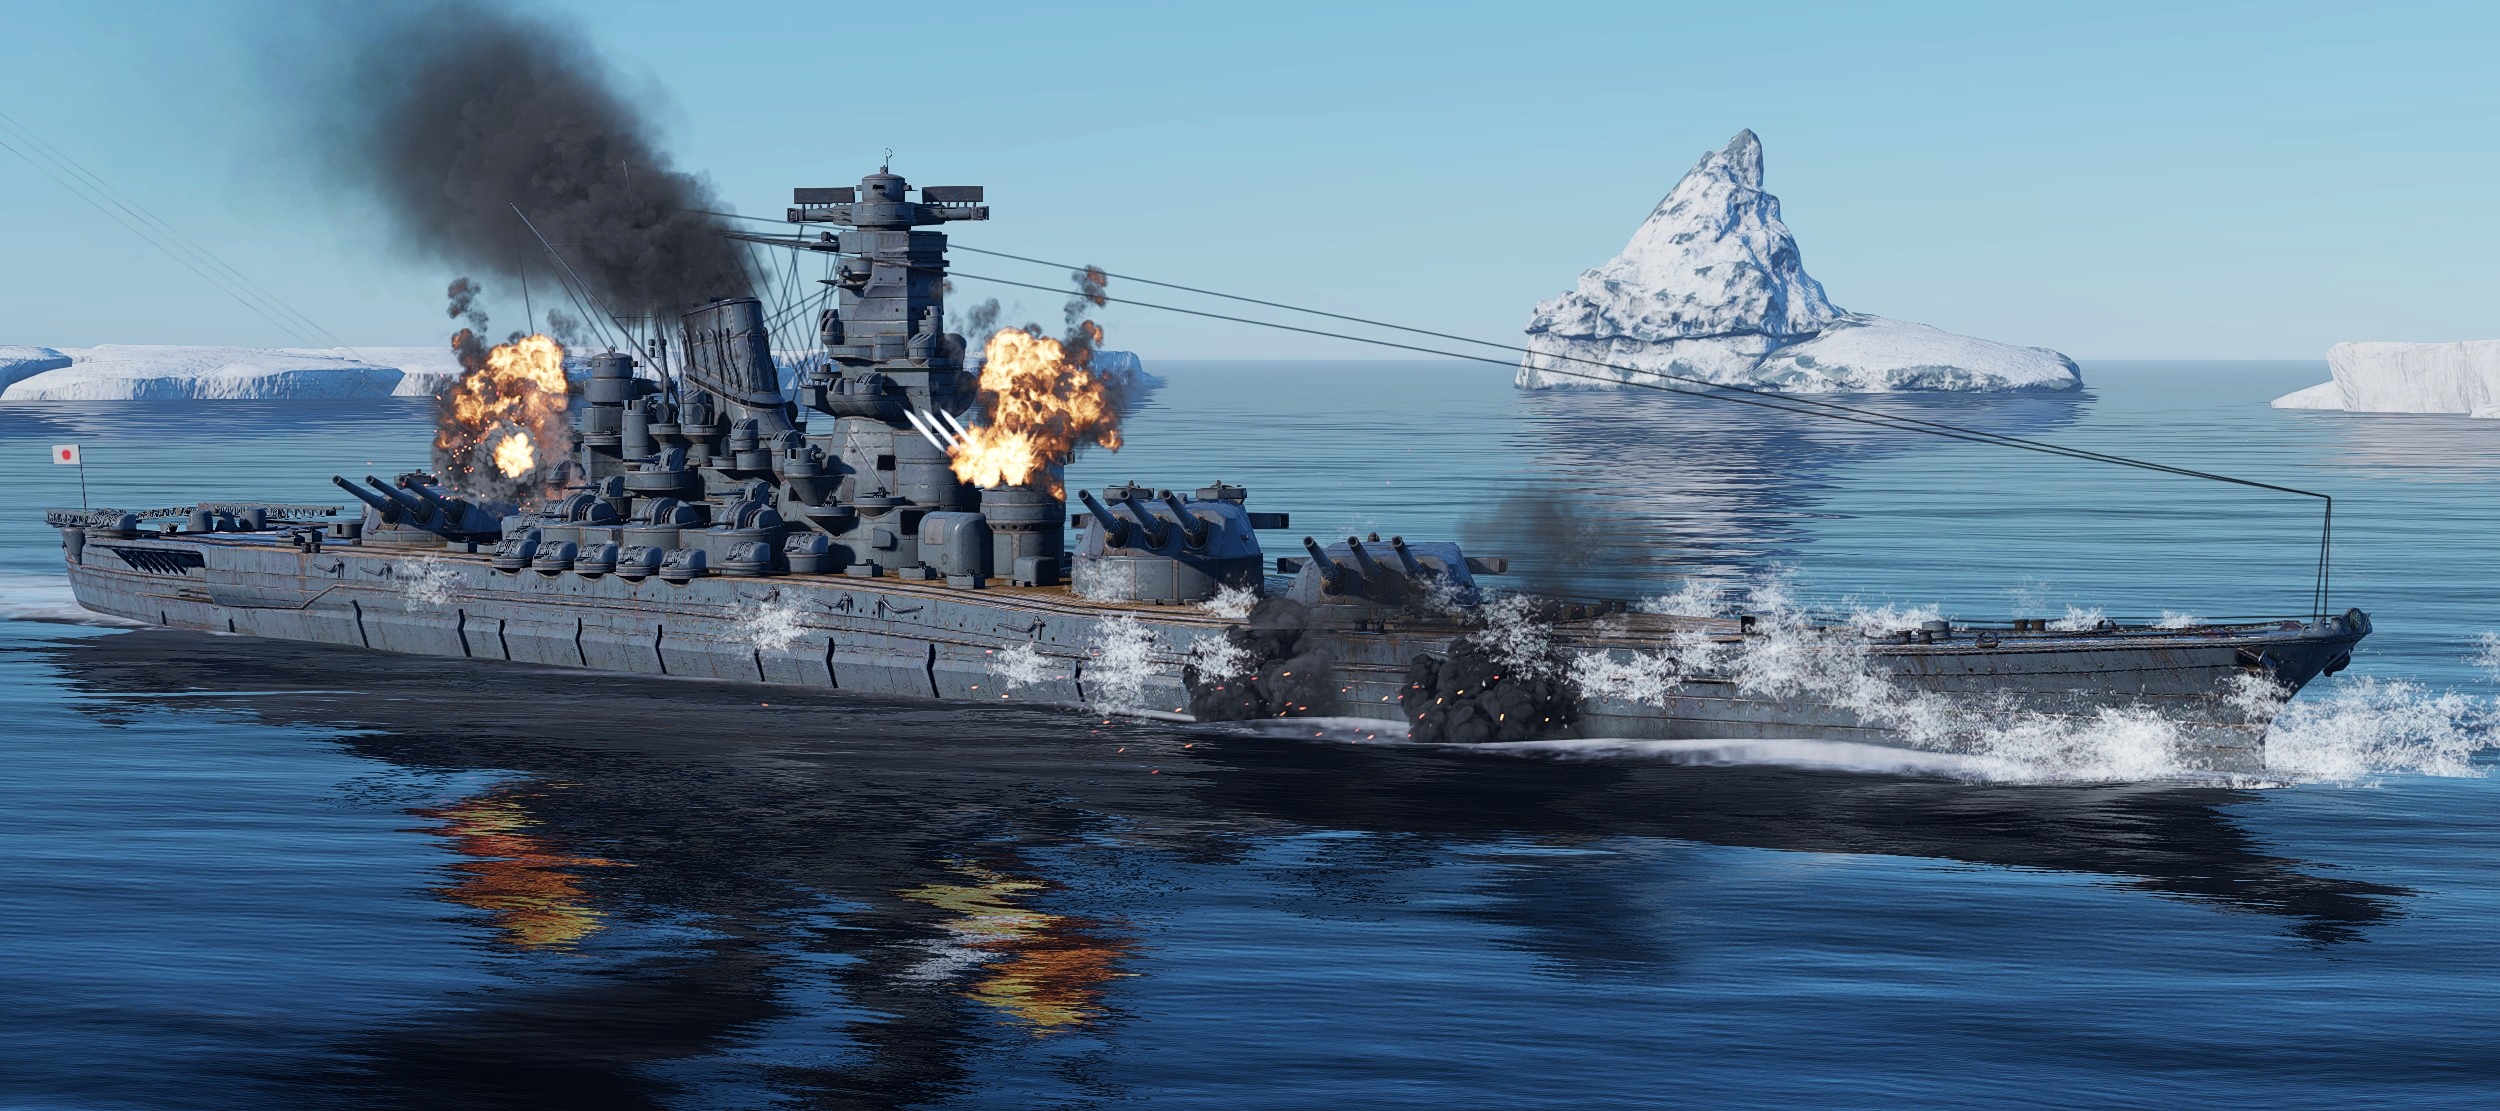
CIWS Features at Rank V
On Rank V battleships and cruisers, the CIWS role is fulfilled by the AA battery, provided it has sufficient rate of fire. Upon activation, all anti-aircraft guns switch to searching for missiles.
Unlike Ranks VI-VII ships, Rank V vessels lack the modern fire control systems needed to calculate missile time-to-fly, so you must rely on visual cues instead. Pay close attention to the sky when the missile warning icon appears.
Decoys Consumable
Type: Manual activation, automatic operation. Capacity: Consumable; replenished via Store purchases. Reload Time: 15 seconds. Duration: 4 to 5 seconds depending on Arsenal upgrades. Effectiveness: Maximum, particularly effective against mass simultaneous salvos. Activation: 3-4 seconds before impact.
Decoys are the most effecitve tool for countering a large salvo of multiple missiles arriving in quick succesion. Deploy them 3-4 seconds before missile impact (the precise timing depends on your countermeasure duration upgrades). During decoy operation, all affected missiles will be diverted away from your ship.
Important! Remember to replenish your countermeasure supply before battle – unlike ECM and CIWS, decoys are not unlimited.
There is little value in using decoys against SAMs – they deal negligible damage, making it wasteful to expend limited charges on them. Decoys are also of limited effectiveness against one or two small missiles.
Do not use decoys recklessly. Learn to time salvos and use countermeasures only when truly necessary. Their average duration is 4-5 seconds and effectiveness is at its maximum, so every activation should be deliberate.
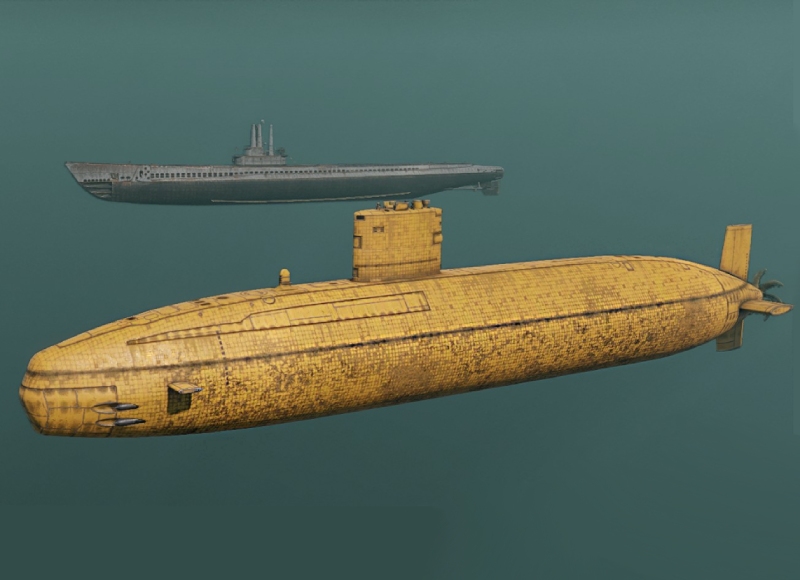
Submarine Countermeasures
Type: Manual activation, automatic operation. Capacity: Consumable, replenished via Store purchases. Reload Time: 15 seconds. Duration: Approximately 10 seconds, or until destroyed. Effectiveness: High, but requires performing a concurrent evasive maneuver. Activation: 3-4 seconds before impact combined with a maneuver.
Submarines have their own countermeasures in the form of anti-torpedo decoys, which protect against the homing torpedoes found in the ASROC (Anti-Submarine Rocket) systems found on many Rank VI and VII ships.
After the homing torpedo separates from its launch rocket, a warning will appear indicating imminent impact. The optimal time to deploy countermeasures is 3-4 seconds before torpedo impact. It is also recommended to execute a sharp course change or accelerate in a straight line to increase the distance between your submarine and the torpedo detonation point.
Important! A submarine, like a surface ship, deploys six decoys – three on each side. Bear this in mind when diverting homing torpedoes approaching from a perpendicular angle. If more than three such torpedoes are incoming simultaneously, the remainder will lock onto decoys deployed from the opposite side, significantly increasing the chance of a hit. Exercise particular caution during large ASROC salvos!
Electronic Countermeasures (ECM)
There are two types of ECM in our game, and it is important not to confuse them. Master the nuances of each, and enemy missiles will become far less of a threat.
Lock-On Interruption System

Type: Manual activation, automatic operation. Capacity: Unlimited. Reload Time: Approximately 70 seconds, depending on the ship. Duration: 15 seconds. Effectiveness: Most effective against two or more opponents simultaneously; inefficient against a single target. Activation: 1-2 seconds before the enemy completes lock-on.
This countermeasure is most effective when an enemy's targeting reticle is locked directly onto you – the game will notify you when this occurs. First, a yellow indicator appears, signaling that the enemy has begun locking on. When the indicator turns red, lock-on is complete and the enemy can fire missiles at you.
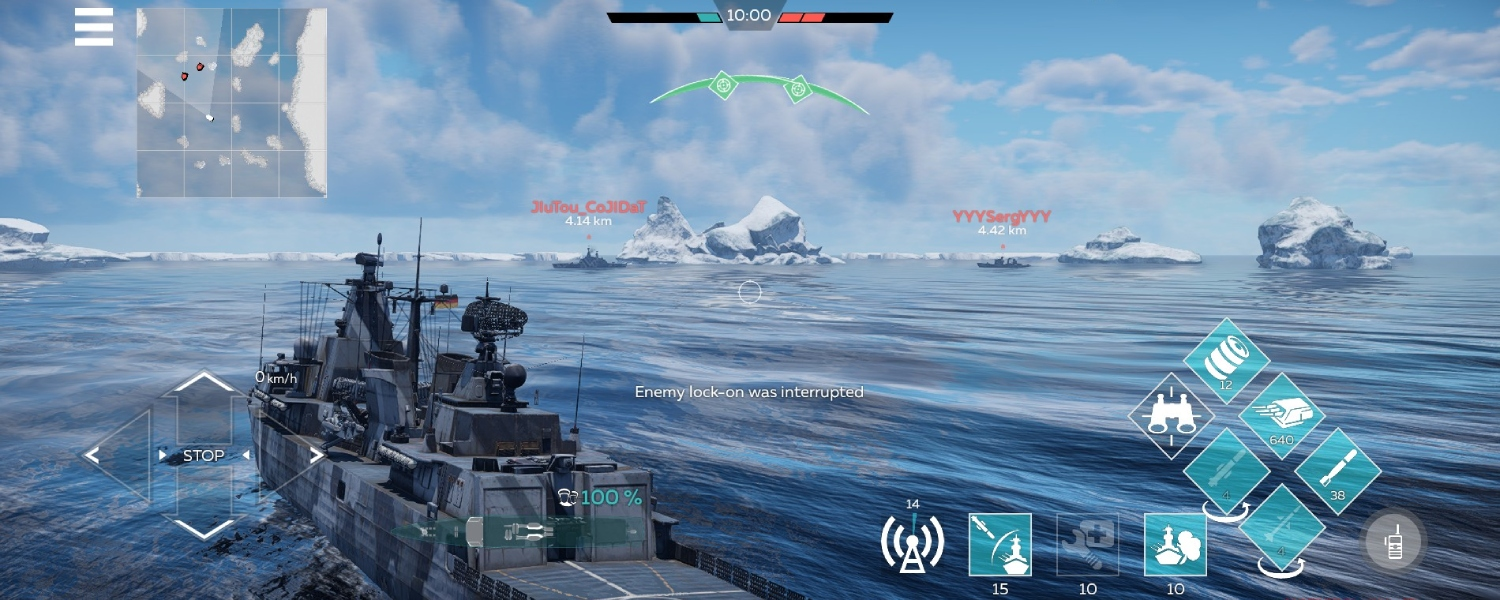
Important: The lock-on interruption system is most effective against multiple opponents locking on simultaneously. Using it against a single target is inefficient – reserve it for situations where two or more enemy ships are attempting to lock on at the same time.
For experienced players, the optimal tactic is to time activation for one or two second before the enemy completes lock-on – this maximizes the duration of protection from incoming missiles.
Missile interception system
Type: Fully manual missile interception. Capacity: Unlimited. Reload Time: Approximately 80 seconds, depending on the ship. Duration: 5 to 8 seconds, depending on ship type. Effectiveness: Most effective in experienced hands. Activation: In response to a large incoming salvo.
This system is most effective against sequential or repeated small missile launches, or to provide cover for an ally.
Upon activation, red diamonds will appear over incoming missiles. Aim at them – once they turn green, the missile has been successfully intercepted.
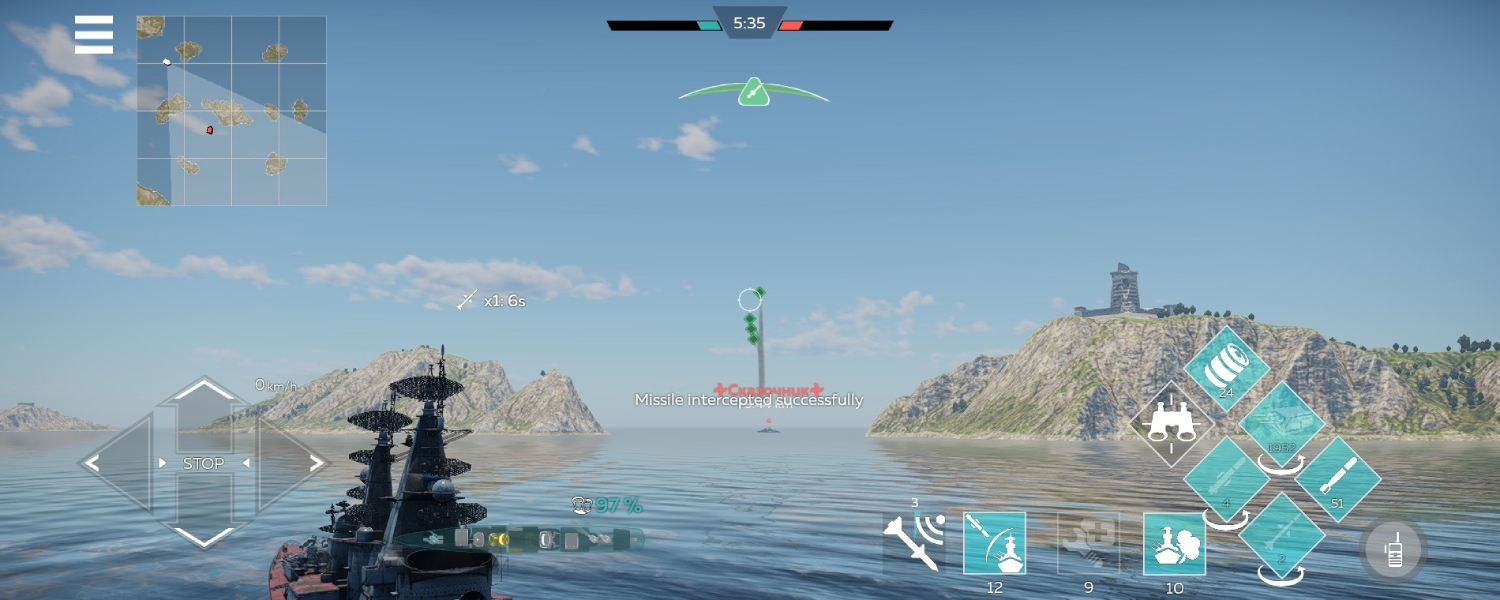
Important! Intercept missiles as far from your ship or an allied vessel as possible. If fewer than 4 seconds remain until impact, the missile will most likely still connect, as it has already committed to its terminal trajectory.
This system demands experience and sharp reflexes, but in skilled hands, even within its brief 5-second window, it can neutralize an entire swarm of enemy missiles!
Smoke Screen
Type: Manual activation. Capacity: Consumable, replenished via Store purchases. Reload Time: 60 seconds. Duration: 30 seconds, beginning two seconds after launch. Effectiveness: Does not divert already inbound missiles, but can break lock-on. Activation: As needed; deploys in the direction the camera is facing.
A smoke screen will not divert missiles or shells already in flight, but it can interrupt or prevent enemy lock-on. Smoke conceals your ship from enemy view, preventing accurate fire and disrupting missile guidance.
Important! Smoke only breaks lock-on 2–3 seconds after the screen is fully deployed. If an enemy has already achieved lock-on before this point, they will still be able to launch a missile salvo despite the smoke. Factor this in and avoid relying on smoke as a last-second measure.
Bear in mind that the screen works both ways – neither you nor any allies covered by smoke will be able to engage the enemy effectively while it is active. Before deploying, look around and ensure the screen will not obstruct a teammate from finishing off an opponent.
Note also that the smoke screen does not deploy around your ship – it is deployed on the side the camera is facing. For example, if an enemy ship is attacking from the left while you are close to destroying a target ahead, deploy the smoke screen to port. This shields you from the second threat while leaving your line of fire to the original target clear.
Q&A
Is it worth activating decoys, ECM, and CIWS simultaneously by pressing all buttons at once?
Is it worth activating decoys, ECM, and CIWS simultaneously by pressing all buttons at once?
Absolutely not – this is a serious mistake.
The CIWS system has no way of knowing that missiles have already been diverted by other means. It will still identify them as active threats and attempt to shoot them down, wasting its resource. Similarly, decoys have no awareness of missiles already intercepted by other systems. Always deploy these systems sequentially to maximize their combined effectiveness.
Why is my CIWS not shooting down missiles?
Why is my CIWS not shooting down missiles?
Check your ship's dead zones and bear in mind that CIWS effectiveness at Rank V is low.
I deployed decoys, but the missile still hit. Why?
I deployed decoys, but the missile still hit. Why?
If decoys are deployed less than 2–3 seconds before impact, the missile does not have sufficient time to alter its trajectory. If deployed more than 5–6 seconds before impact, the decoys may lose effectiveness before the missile arrives, potentially allowing it to reacquire its original course.
Captains, the key principle to remember is this: no single system offers absolute protection, but the skillful and timely use of all available tools can make your ship nearly invulnerable in close combat. Use CIWS, ECM, and countermeasures wisely, according to the situation, learn the full capabilities of your ship – and enemy missiles will be powerless against you.